Progress This bread is from Maangchi. She is a You Tuber and blogger that teachers her audience how to make different Korean foods and goodies. This is her recipe for 'Roll-ppang' or 'Dinner rolls.' Now she describes how she made these for her children, but you can eat these whenever you want with whatever you want. Let's get started, shall we? Ingredients
2) Mix in 1/2 Cup Milk, 1/4 Teaspoons of Salt, and 2 Tablespoons of Sugar. Make sure they are well combined. 3) Add 1 egg and 2 Teaspoons of yeast then mix. Let sit for 1 minute. 4) Add 1 1/2 Cups of Flour and mix well. The dough will be very stick. This is what you want. 5) Let the dough rise for 1 Hour and cover the pot. If you are in a colder environment, at least allow the dough to double in size. 6) Kneed the dough for a Couple Minutes to let all the gasses out. Cover and let it sit for another 30 Minutes. 7) Kneed and deflate until you can make a smooth ball. 8) Put 1/4 Cup Flour on a clean and dry working surface. Move the dough ball to this floured surface and divide into 6 parts. 9) Dust your hands and roll out a dough piece to make a cylinder that is 8 Inches long. Coil the cylinder to bring one side up from the bottom through itself like a little knot. In her video, she put her dough into a 7X8 inch pan. I put mine in a 9X5 inch pan. In the end, put your dough in a non-stick pan. You don't want the pan to be too wide as it will make little bread cakes instead of rolls.  10) Repeat this process with the other 5 Pieces of dough and try to evenly place them all 11) Let the dough rise for 1 hour 12) Preheat your oven to 350F. Brush the egg white on top of the dough and bake for 15-17 Minutes until the top turns a golden-brown color. 13) Brush with egg white again and bake for another Minute. 14) Remove your rolls from the oven and enjoy. 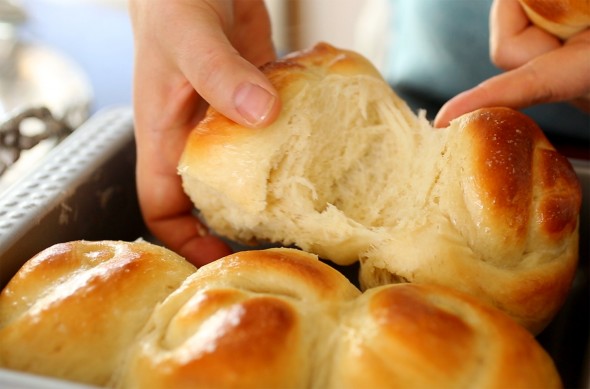 ReflectionI liked this recipe, but when I made it, I think it could have been better as it was dry. The reason why I brought up the differences of non-stick pan is because when I let the dough rise in my pan, they ended up becoming little cakes instead of rolls. 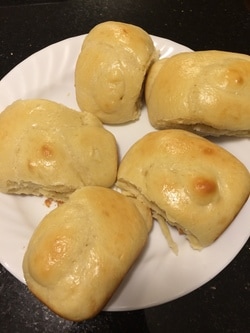 Well, you can kind of see where the tips were supposed to be as they re lightly browned. They were also kind of bland. What I actually did was freeze them so I could microwave and eat it on a later date. Overall, I think I should have added a tad bit more water as they also were kind of dry and compacted. I also made the mistake when trying to prepare ahead of time, I mixed dry and wet ingredients which clumped together.
0 Comments
Progress Before we start, I just wanted to say that "anyone can cook." Chef Gusteau from Disney's Ratatouille should be inspiration to those that claim "I can't cook." or "I can't bake. I just burn everything." Everyone can follow instructions. If you have made your way to my site, I'm sure you are able to read. As long as you can both read and follow instruction, you will be able to bake these breads. Today, we shall start off fairly simple and not take too long. As will with most of the breads I am making, the recipe is found from allrecipes.com. The original publisher is Chef John. Ingredients
1) In a large bowl, stir your 1/2 cup warm water, 1 1/2 ounces of yeast, and 1/2 cup of your flour. After stirring, cover it, and let it sit for about half an hour (30 minutes) in a warm spot. Since it's currently winter and temperatures are quite cool for yeast, I did my laundry as the dryer warms the small closet it is in. If you can't find a warm place, you may want to wait longer (depending on how cold it is) as the dough needs some time to rise. 2) Now, combine everything else with the dough that you have so far. That includes the can of beer, 4 cups of flour, and 1 1/2 teaspoons of salt. Make sure there is no flour left uncombined. It should be sticky and may stick to the sides of your bowl. Fear not as this is what you want. Let your dough to sit for another 2 hours. If you haven't already noticed, bread times quite a bit of time to make. Be prepared for future recipes to even wait overnight or a full day. Sourdough starters need to sit for at least three weeks! 3) Flour a flat and clean surface, like a counter top. Transfer the dough to the surface and scrape all of the dough out of its bowl. You now want to shape the dough into your loaf and lavish it with flour all around. 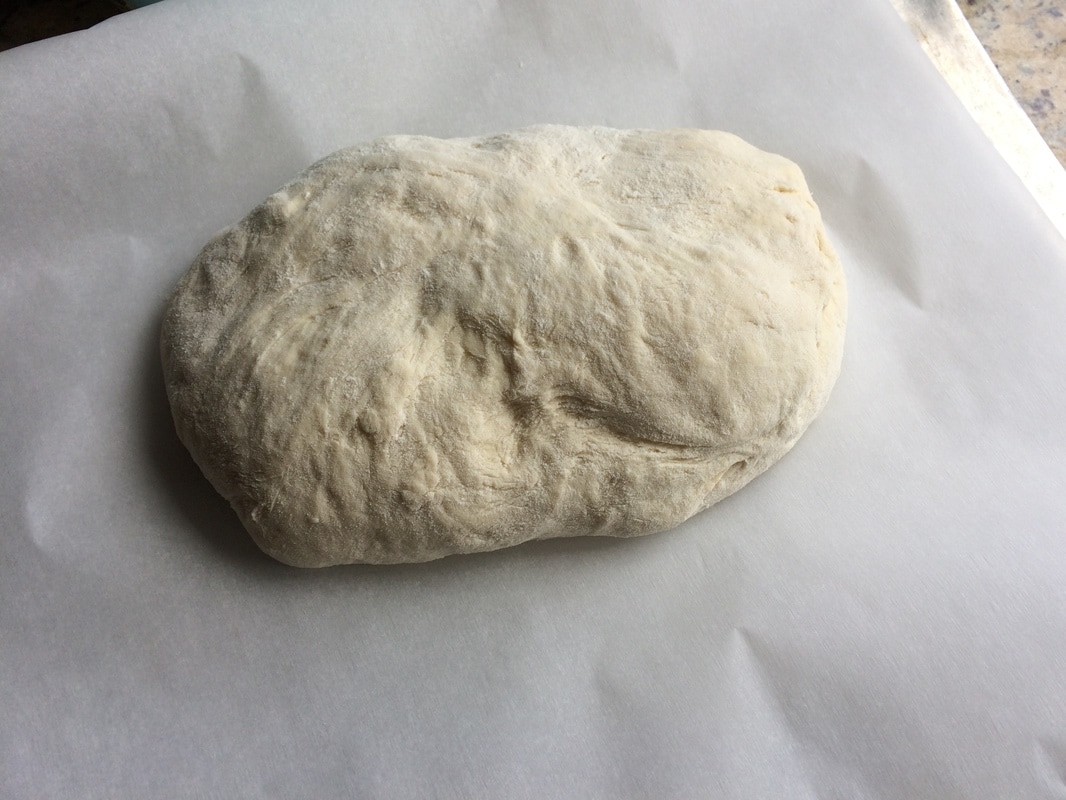 The above is my dough that has been shaped. 3) Cover a baking sheet with parchment paper and transfer the shaped dough onto it. 4) Cover it with a towel or something, and let it sit for another 30-40 minutes to rise. 5) Preheat your oven (yes, that always ruined your past attempts at baking) to 425 degrees Fahrenheit. Place some metal or oven safe glass-ware with water to humidify the oven. The water will help to keep the bread from becoming dry. 6) Slice a few long slits onto the top of the dough. 
ReflectionPersonally, I had the bread fresh out of the oven with my parents and Presitent butter. There is nothing like fresh bread straight from the oven. Be care as it is hot, and you can burn yourself. For my loaf, I think I could have shaped it more like a loaf. It is surprisingly heavy too. I didn't expect it to be so. After a long day of waiting mostly, I find it very rewarding to have the bread. It can be eaten with soup, butter, or just simply by itself. By the time I have made this blog post, I have already baked this same recipe twice and am still satisfied by the fruits of my labor. In all honesty, this is not very filling. i actually nearly consumed the whole loaf by my lonesome this time when I made it. I have made this loaf one more time after this loaf, and my family and I ate it with my mother's chili. Overall, it's a simple recipe that most can make cheaply and quickly (compared to most other bread that require waiting for the dough to rise). I hope you enjoyed and can share with others.
|
AuthorWrite something about yourself. No need to be fancy, just an overview. Archives
April 2017
Categories |


 RSS Feed
