Progress For this recipe, we will be making a simply bread dough, and if you are like me and can't toss dough like the professional pizza makers, then this recipe is perfect for you. For this recipe, you will need the following:
 ReflectionMy experience with this recipe was great when I first made this last year, but I used the American wheat flour instead of all-purpose. This caused my dough to be much drier which entailed that I use way more water and oil to at lest get the dough to a usable consistency. 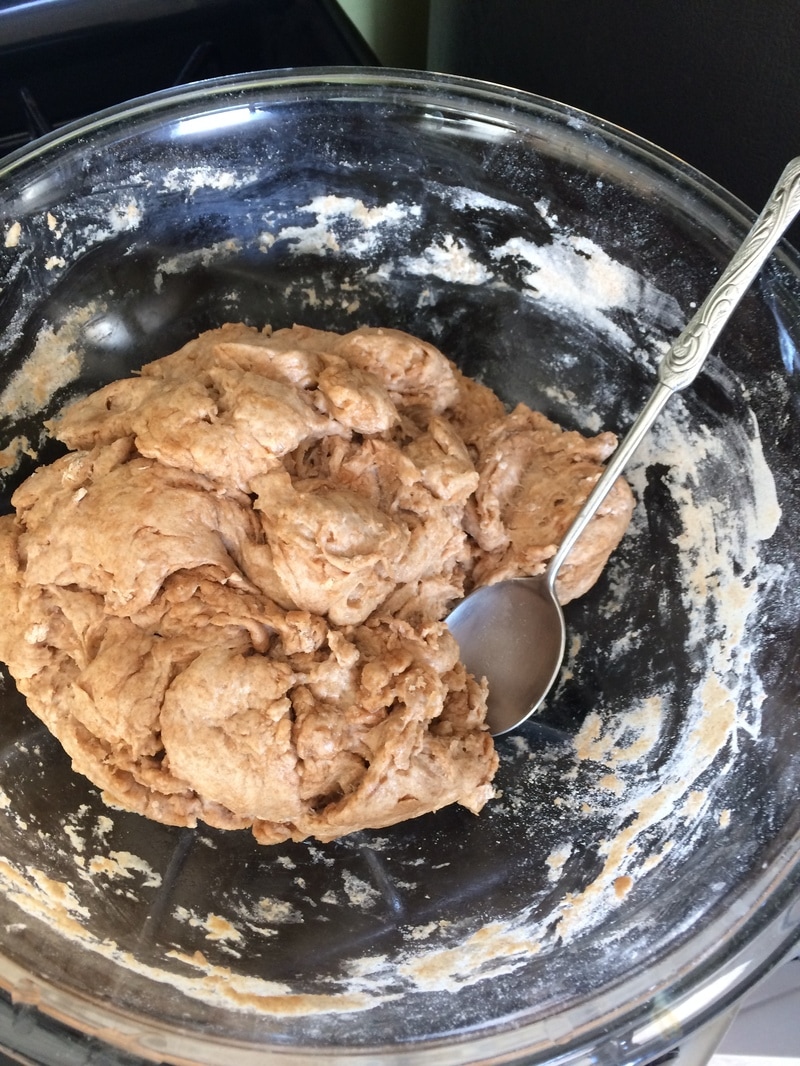 As you can see, the dough isn't evenly mixed. Eventually, I resorted to a bread mixer with the hook attachment which really helped me. In the future, I will not use this wheat flour but at least some flour that is more fluffier and finer than this flour. In the end, the pizza was great! I had the pizza with salad and a bottle of ginger beer. I was pretty satisfied although I had some issues with the dough.
0 Comments
ProgressFor this recipe, the bread dough will need to ferment a much longer time so prepare to wait up to a week. To begin you only need a few items
ReflectionSurprisingly, I didn't think about creating a YouTube channel to get around the weebly maximum data file. Unfortunately, the video on the right was cut short due to the fact that my iPhone ran out of memory space. Thus far, both of my starters seem to be well. I am excited to seem how my sourdough will come out to be. Hopefully, I will be able to bake a sourdough bread bowl and perhaps put soup in it on a later date as the weather lately has permitted the idea of it. for the next blogs, I am hoping I will be able to utilize YouTube and post a video of how to bake and pipe. I feel excited at the prospect of being able to post on a public website yet fear that people may judge me as I have heard many crying due to the sheer quantity of negative comments. Still, I shall persevere and ignore the naysayers and share my passion with others.
Progress
INGREDIENTS
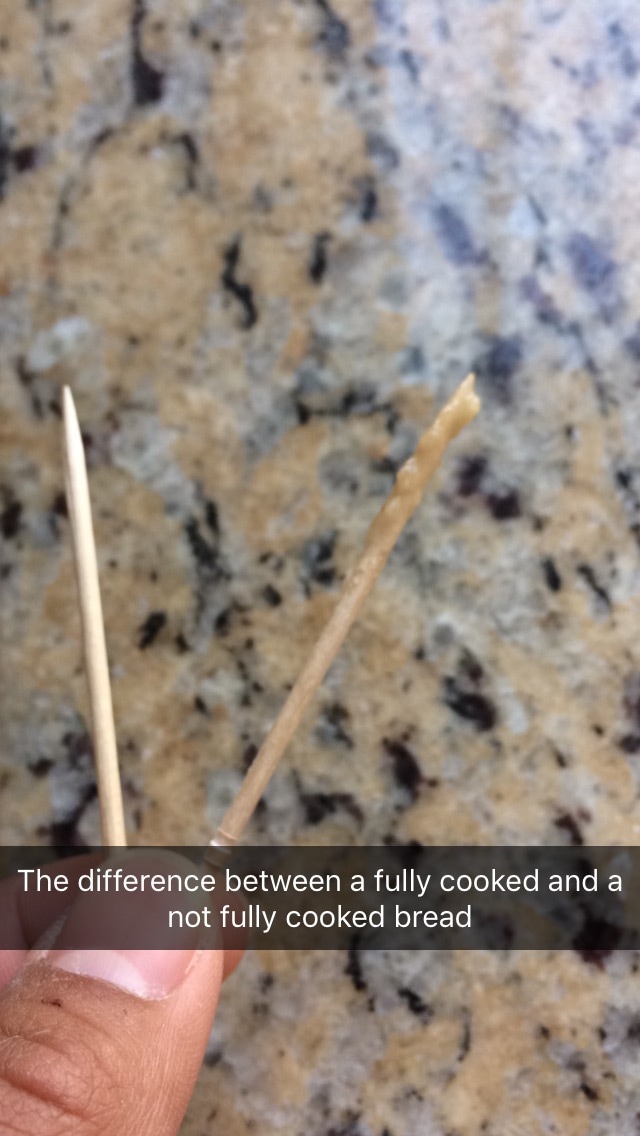
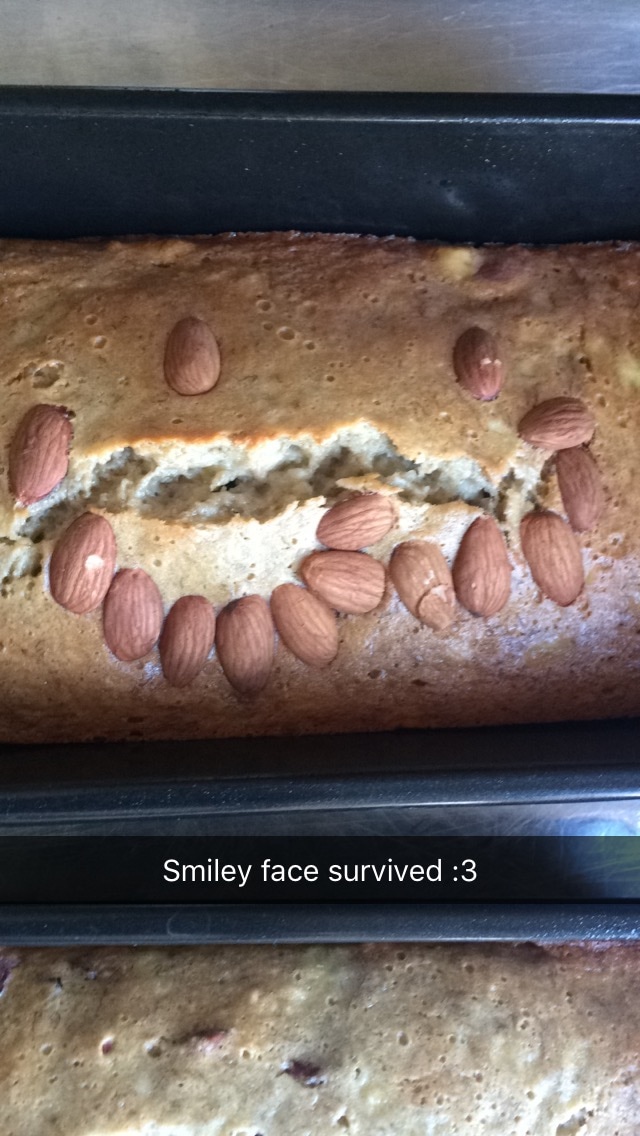
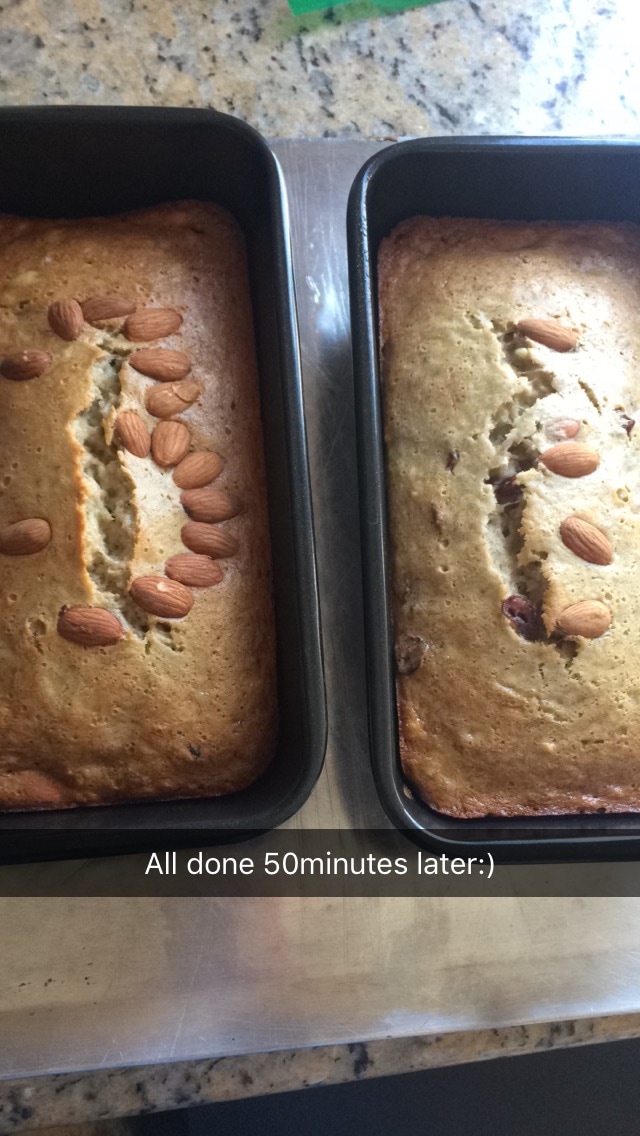
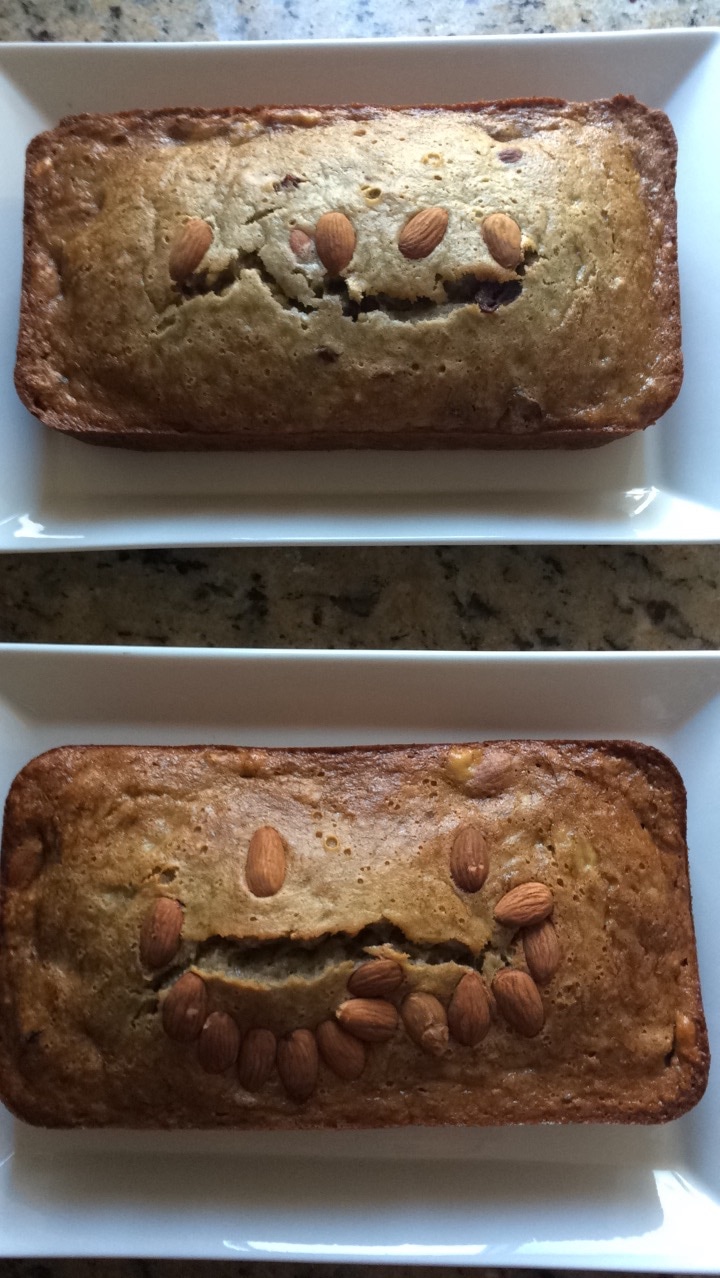
ReflectionUnfortunately, I attempted to record my work with a time-lapse with my iPhone, but the video was too fast to comprehend and also too large for weebly to let me to upload for free. I turned to a trial version of a video/audio editor that is displayed in my videos. Due to my account being free, I had to upload the videos via a file and not just a video. Overall, I think next time I will not use the time-lapse from my iPhone. The banana bread is good as always. Normally I do not put anything in it, but my mother wanted me to put them in. I found my use of applesauce in place of butter to be clever. In the realm of baking, many substitutes for different ingredients exist. My next recipe comes from a friend so y'all keep an eye here for my next bread.
ProgressBefore we begin, I want to thank my friend who graciously gave me this recipe. The origin of this recipe I do not know. Also, I will be using a mixer with a bread dough hook attachment.
 Now that the bread is done, try tasting it fresh from the oven with butter. Enjoy another delicious bread recipe with your friends and family including yourself. This will go excellent with a soup for as an entree with a lunch. Try playing around with what you and other like. ReflectionOverall, I didn't expect the dough to be so sticky. The end product was delicious for me though. I still believe there is nothing like fresh bread from the oven with a good butter. In the near future, I may try to make this bread again and have it with soup, perhaps I shall invite a friend and make a soup to compliment the bread. Unfortunately, I didn't get much media as I didn't have anything to take pictures of my bread until the very end.
Progress This bread is from Maangchi. She is a You Tuber and blogger that teachers her audience how to make different Korean foods and goodies. This is her recipe for 'Roll-ppang' or 'Dinner rolls.' Now she describes how she made these for her children, but you can eat these whenever you want with whatever you want. Let's get started, shall we? Ingredients
2) Mix in 1/2 Cup Milk, 1/4 Teaspoons of Salt, and 2 Tablespoons of Sugar. Make sure they are well combined. 3) Add 1 egg and 2 Teaspoons of yeast then mix. Let sit for 1 minute. 4) Add 1 1/2 Cups of Flour and mix well. The dough will be very stick. This is what you want. 5) Let the dough rise for 1 Hour and cover the pot. If you are in a colder environment, at least allow the dough to double in size. 6) Kneed the dough for a Couple Minutes to let all the gasses out. Cover and let it sit for another 30 Minutes. 7) Kneed and deflate until you can make a smooth ball. 8) Put 1/4 Cup Flour on a clean and dry working surface. Move the dough ball to this floured surface and divide into 6 parts. 9) Dust your hands and roll out a dough piece to make a cylinder that is 8 Inches long. Coil the cylinder to bring one side up from the bottom through itself like a little knot. In her video, she put her dough into a 7X8 inch pan. I put mine in a 9X5 inch pan. In the end, put your dough in a non-stick pan. You don't want the pan to be too wide as it will make little bread cakes instead of rolls.  10) Repeat this process with the other 5 Pieces of dough and try to evenly place them all 11) Let the dough rise for 1 hour 12) Preheat your oven to 350F. Brush the egg white on top of the dough and bake for 15-17 Minutes until the top turns a golden-brown color. 13) Brush with egg white again and bake for another Minute. 14) Remove your rolls from the oven and enjoy.  ReflectionI liked this recipe, but when I made it, I think it could have been better as it was dry. The reason why I brought up the differences of non-stick pan is because when I let the dough rise in my pan, they ended up becoming little cakes instead of rolls. 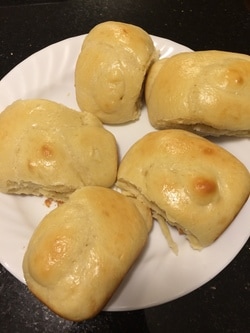 Well, you can kind of see where the tips were supposed to be as they re lightly browned. They were also kind of bland. What I actually did was freeze them so I could microwave and eat it on a later date. Overall, I think I should have added a tad bit more water as they also were kind of dry and compacted. I also made the mistake when trying to prepare ahead of time, I mixed dry and wet ingredients which clumped together.
Progress Before we start, I just wanted to say that "anyone can cook." Chef Gusteau from Disney's Ratatouille should be inspiration to those that claim "I can't cook." or "I can't bake. I just burn everything." Everyone can follow instructions. If you have made your way to my site, I'm sure you are able to read. As long as you can both read and follow instruction, you will be able to bake these breads. Today, we shall start off fairly simple and not take too long. As will with most of the breads I am making, the recipe is found from allrecipes.com. The original publisher is Chef John. Ingredients
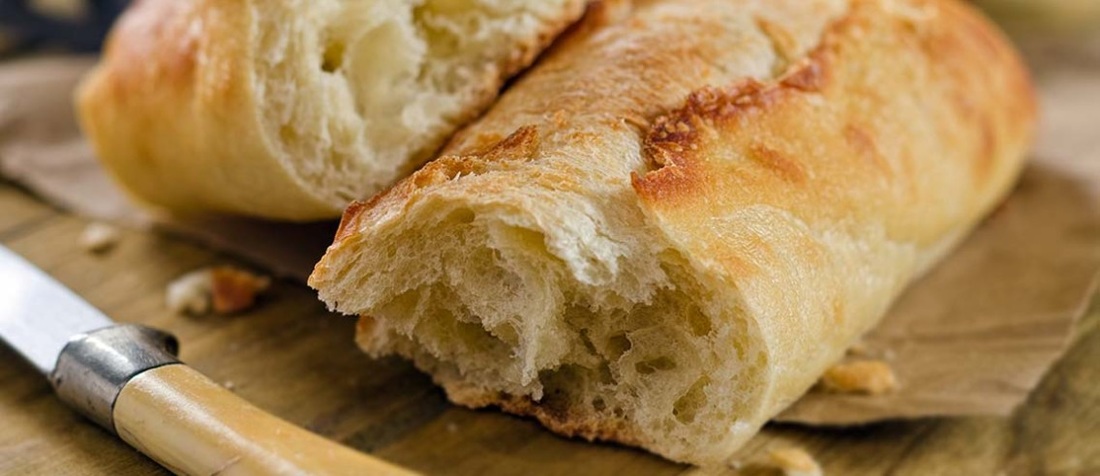
1) In a large bowl, stir your 1/2 cup warm water, 1 1/2 ounces of yeast, and 1/2 cup of your flour. After stirring, cover it, and let it sit for about half an hour (30 minutes) in a warm spot. Since it's currently winter and temperatures are quite cool for yeast, I did my laundry as the dryer warms the small closet it is in. If you can't find a warm place, you may want to wait longer (depending on how cold it is) as the dough needs some time to rise. 2) Now, combine everything else with the dough that you have so far. That includes the can of beer, 4 cups of flour, and 1 1/2 teaspoons of salt. Make sure there is no flour left uncombined. It should be sticky and may stick to the sides of your bowl. Fear not as this is what you want. Let your dough to sit for another 2 hours. If you haven't already noticed, bread times quite a bit of time to make. Be prepared for future recipes to even wait overnight or a full day. Sourdough starters need to sit for at least three weeks! 3) Flour a flat and clean surface, like a counter top. Transfer the dough to the surface and scrape all of the dough out of its bowl. You now want to shape the dough into your loaf and lavish it with flour all around. 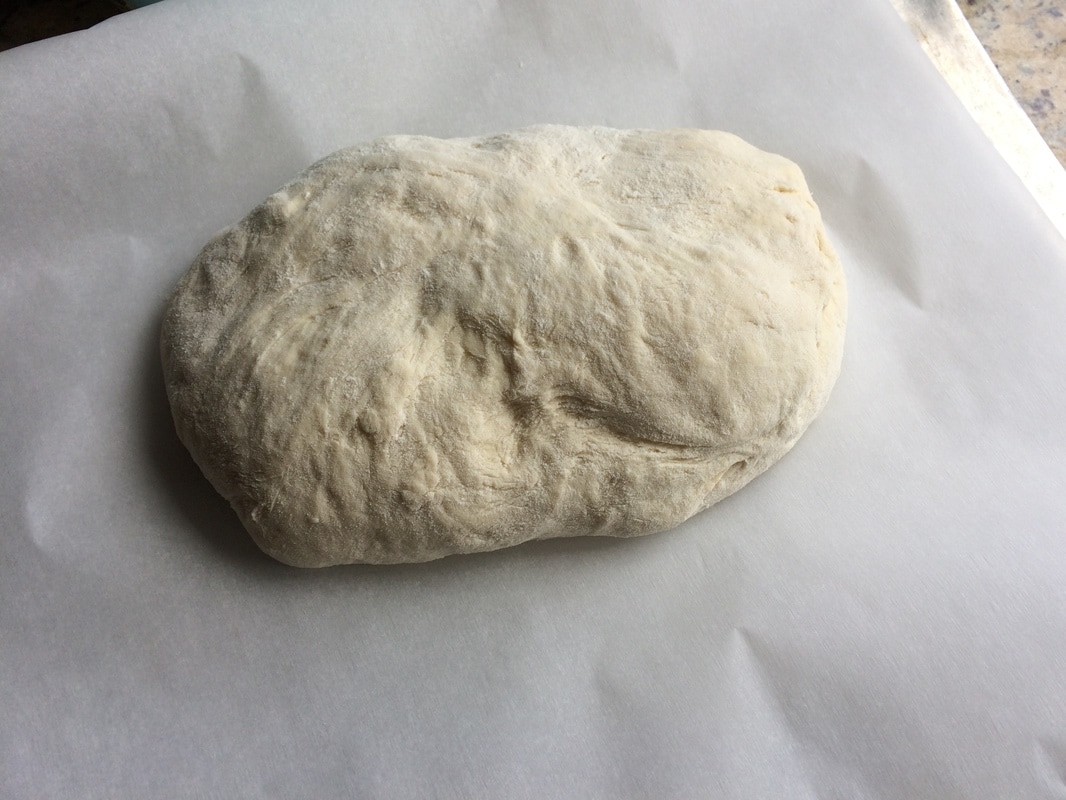 The above is my dough that has been shaped. 3) Cover a baking sheet with parchment paper and transfer the shaped dough onto it. 4) Cover it with a towel or something, and let it sit for another 30-40 minutes to rise. 5) Preheat your oven (yes, that always ruined your past attempts at baking) to 425 degrees Fahrenheit. Place some metal or oven safe glass-ware with water to humidify the oven. The water will help to keep the bread from becoming dry. 6) Slice a few long slits onto the top of the dough. 
ReflectionPersonally, I had the bread fresh out of the oven with my parents and Presitent butter. There is nothing like fresh bread straight from the oven. Be care as it is hot, and you can burn yourself. For my loaf, I think I could have shaped it more like a loaf. It is surprisingly heavy too. I didn't expect it to be so. After a long day of waiting mostly, I find it very rewarding to have the bread. It can be eaten with soup, butter, or just simply by itself. By the time I have made this blog post, I have already baked this same recipe twice and am still satisfied by the fruits of my labor. In all honesty, this is not very filling. i actually nearly consumed the whole loaf by my lonesome this time when I made it. I have made this loaf one more time after this loaf, and my family and I ate it with my mother's chili. Overall, it's a simple recipe that most can make cheaply and quickly (compared to most other bread that require waiting for the dough to rise). I hope you enjoyed and can share with others.
Progress Bread. The simple food that we enjoy hot and fresh with butter that becomes stale in less than a week. So, what is it? The Merriam Webster's dictionary states "a usually baked and leavened food made of a mixture whose basic constituent is flour or meal" and "a baked food made from a mixture of flour and water." We all know its baked. You get it from the bakery. We all know it at least contains flour and water. Not all breads contain yeast. An example is unleavened bread. Sometimes unleavened bread is called flat bread as it is flat because there is no yeast to make it rise. What purpose does yeast have in breads you ask? For those that do not already or forgot, yeast makes the bread rise. Yeast is actual fungus that consumes the sugars in the dough which comes from added sugar, alcohol, or even just from your flour that you use. As the yeast consumes the sugars in the dough, it makes carbon dioxide gas which makes the dough rise and form bubbles in the bread while baking. It also is what you smell when you let the dough rise and uncover. That smell is the gas. Personally, I like that smell. The smell of freshly baked bread is also wonderful. I hope this is a good introduction to my blog on bread for all of you guys. Please, feel free to comment below to share your experiences with bread with others and perhaps even with me. You can also leave recipes for me to perhaps bake. The first few breads will be simple and will become more sophisticated as time progresses. ReflectionAfter probably a mere two hours, I have completed my first blog. It was fairly simple as it is just a mere introduction to my project as a whole. I would say that bread baking is very entertaining in its own way, and many people do not understand what it is like. I myself find that time move to is evasive which allows me to assume the case is also the same for others. After this, I will make blogs on bagpipes. Although not much was done, I feel a strong sense of satisfaction as I share my knowledge with others. The majority of the information was from my own prior knowledge and experiences. Personally, my favorite butter is salted President butter. It is imported from butter. Although a really good butter for fresh bread, I cannot find this in many grocery stores aside from the Fresh Choice market which is out of my way but totally worth it. I suggest for all to find a good butter that you like if you make fresh bread and want to enjoy the fruits of your labor.
|
AuthorWrite something about yourself. No need to be fancy, just an overview. Archives
April 2017
Categories |
||||||||||||||||||||||||


 RSS Feed
